

DIY Clay Decorations – Christmas Gifts for Children to Make!
Homemade gifts can be so special and thoughtful. In this post we share how our children are making simple homemade star decorations for their teachers and friends this Christmas. This is a really lovely activity to highlight the joy of giving and enter into the Christmas spirit.
Starting with some DAS Modelling Clay – we chose white – we rolled it out to around 1cm thick, and using a Giant Star Cookie Cutter we cut out our stars.

You will need to make a circular hole where you want to hang the decoration from – for this size of decoration, a pencil worked well. Don’t put it too close to any of the edges or they may break when dry.

Now it’s time to personalise the decoration. There are so many options for this, depending on what you have available. Here are a few ideas:
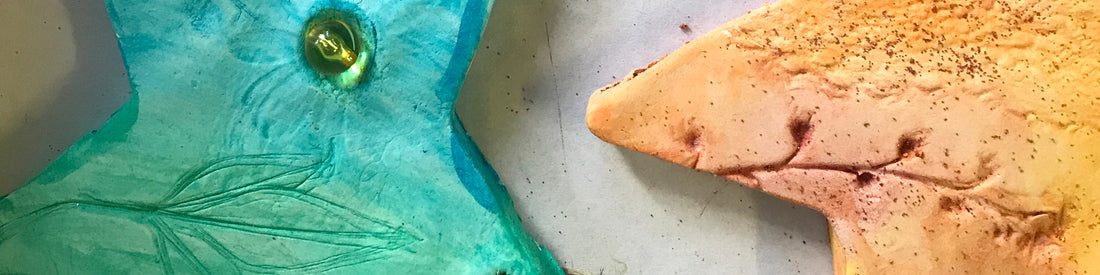
- Our favourite - Place lace / textured material/ fresh leaves / flowers on the top and gently roll over with a rolling pin to make beautiful imprints

- Press in rubber stamps – a pattern or letters to spell a word or name.
- Use a smaller cutter inside, or carefully cut with a knife to make an outlined shape instead.
- Cut out a pattern of holes that when dried can have cord / ribbon / yarn threaded through.
- Decorate with small gems, shells, gumnuts, dried flowers or other treasures.
- Leave plain for now, but and then use two or three complimentary coloured watercolours to paint over them. Add a little Biodegradable Eco Glitter to a few areas for extra interest (and sparkle!)
Carefully pick these up and place apart from each other on cardboard, or something else sturdy that you will be able to move (they will need to dry for a day or two).

We gathered our supplies – a set of Honeysticks Natural Watercolour Paints and a few Biodegradable Eco Glitters.

Picking two or three complimentary colours, we painted over the surface (and around the edges).

We added a sprinkle or two of Biodegradable Eco Glitter to some of our stars for extra sparkle!

When the paint is dried:
- Add a beautiful ribbon, cord or Eco-Wool (fingerknit or plaited) through the hole and knot the ends together.
- A few wooden or homemade, painted clay beads look beautiful added to the hanging cord.

Happy crafting! We would love to see your creations!
